


// Photography by Angie Garcia //
When Summer comes around, I’m literally TRYING to keep my cool. One of my tricks is this easy Five Minute Updo that I found a couple of years of Pinterest! I am a sweaty Betty and live in dresses and partial/complete updos. That combination is easy peasy, minimal effort, and comes straight from the runways!
It literally takes no time to do and I’ve worn my hair like this to formal occasions and just hanging with the kids. I also created a quick video tutorial for you because sometimes it’s easier to watch how to do it! (It’s less than 5 minutes!) Let me know if you have any questions and Happy Hair Days to you!
P.S. These pictures and videos were shot last March, so please excuse the grey hairs! #yikes
WHAT YOU NEED //
- bobby pins (if you have bangs or want to put the front up)
- magic grip hair pins (or bobby pins)
- hair elastics (4 total – I use clear & black)
- hairspray (I’ve been using this Aveda product for years!!!)

Here’s the VIDEO and scroll down for the step by step!

HOW TO EASY FIVE MINUTE HAIR UPDO
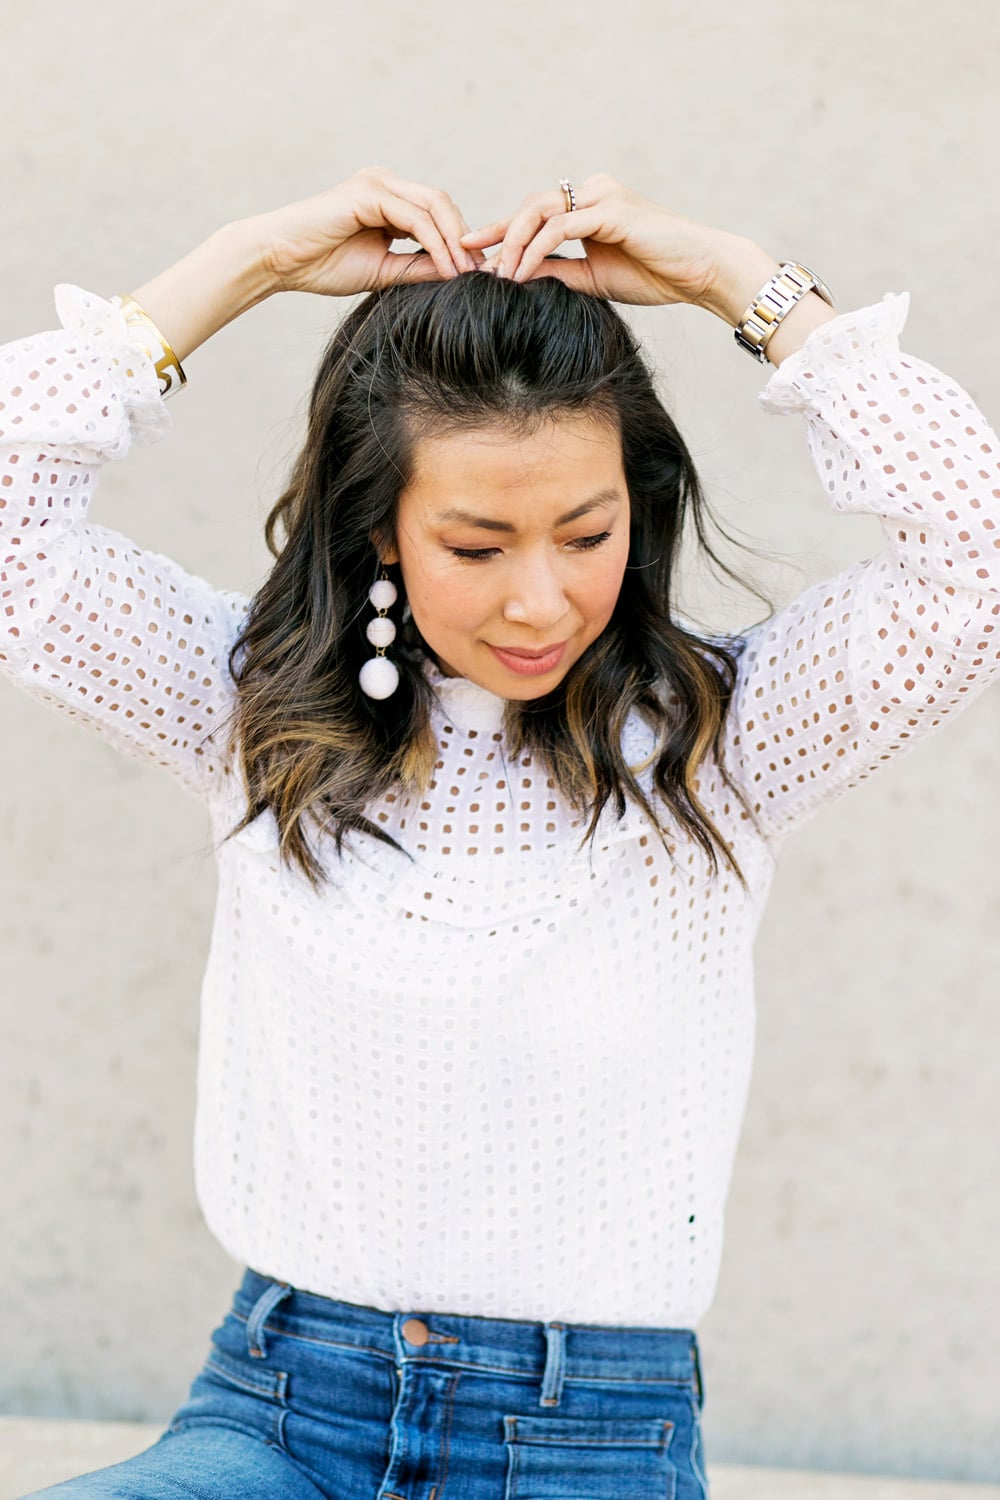
STEP ONE // FIX YOUR FRONT
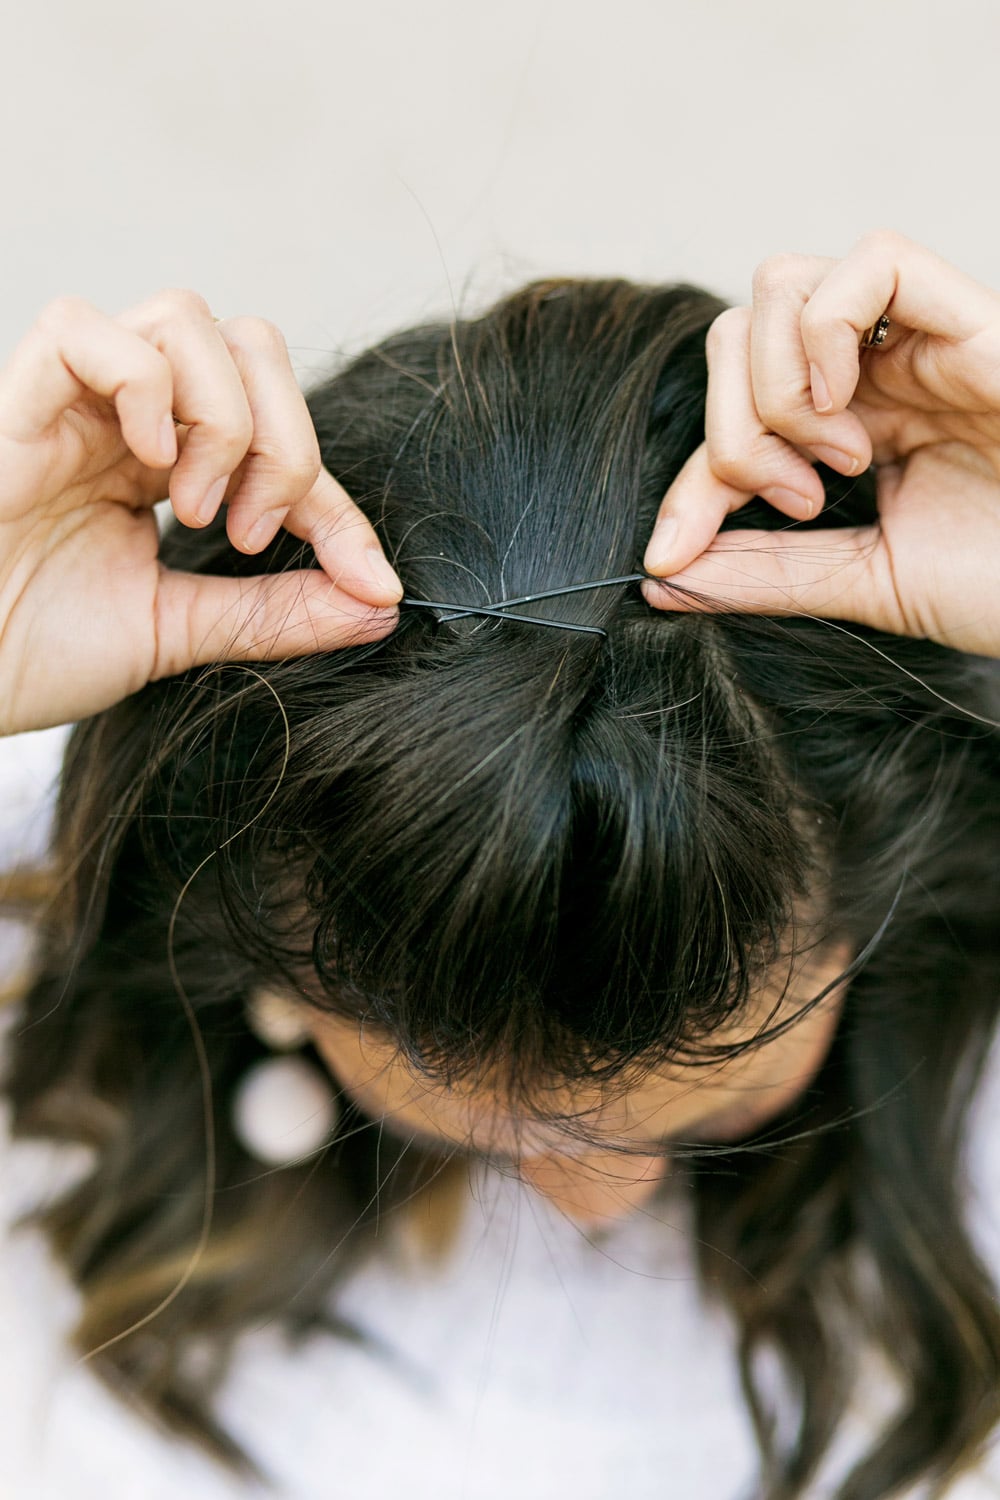
If you have bangs, then you can leave them. If you don’t then you can either pull some hair to fall on the side of your face, split down the middle/side, or pin it back as I did. I like to create that “pouf” in front which seems to be flattering for my face shape!
Pull your hair back starting at the corner edges of your hairline, twist (to give it that volume), and then bobby pin in an “X” shape as shown in the second picture. That holds it in place. You call pull out the hair to make it higher. The higher the hair, the closer to Heaven right?!
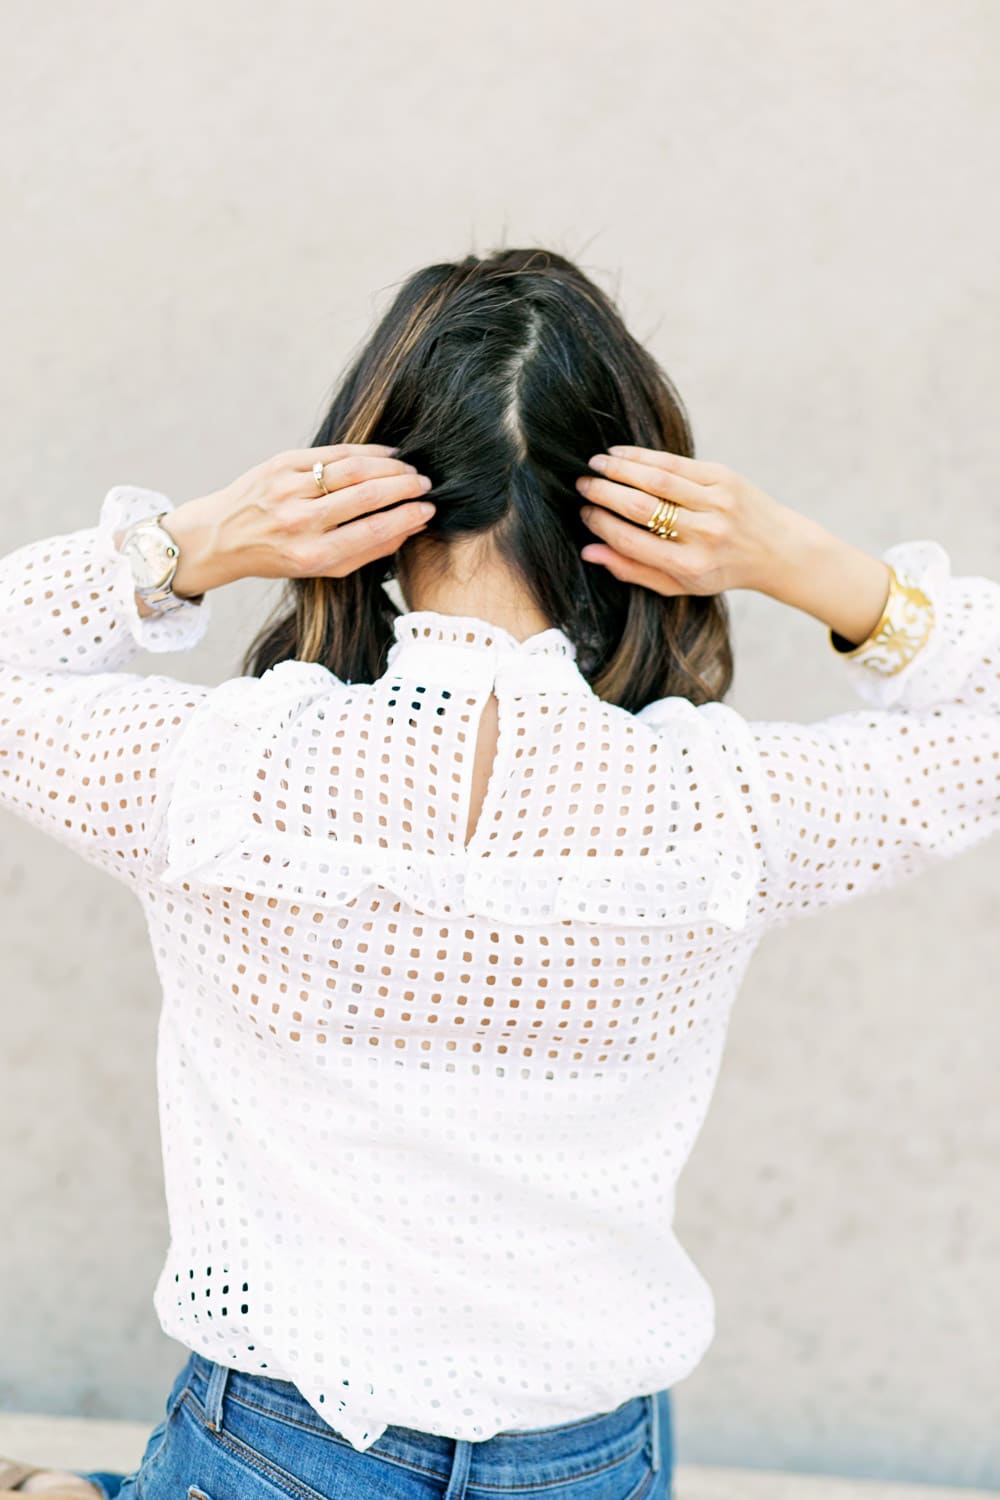
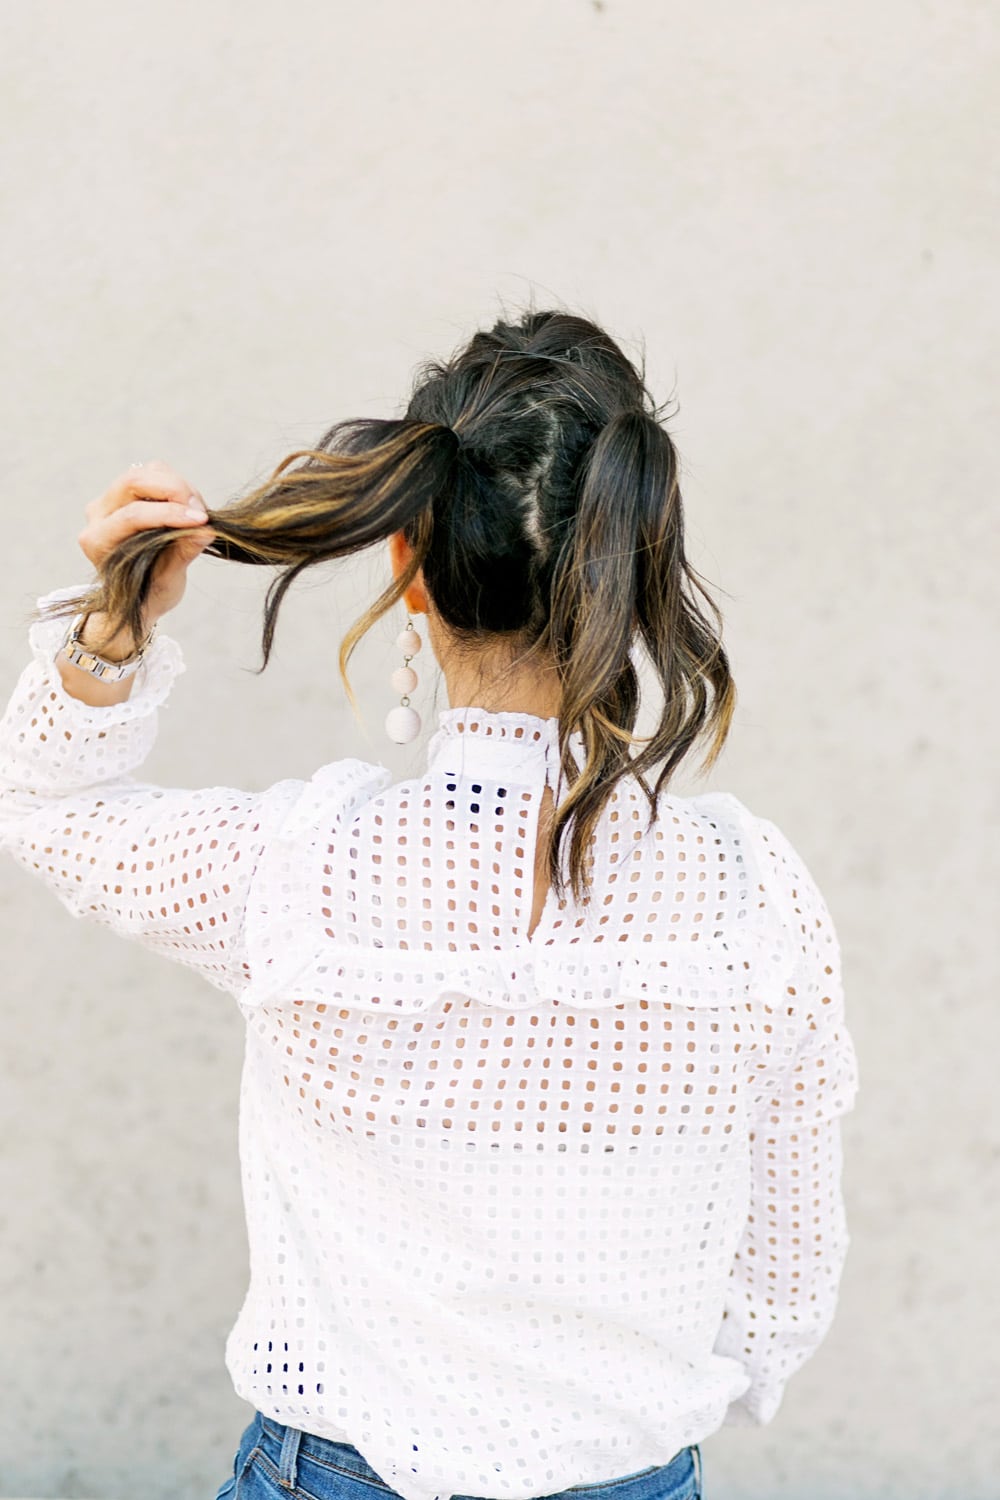
STEP TWO // SPLIT IT IN BACK
Split your hair down the middle. I did it really quickly so it’s uneven, but you can use the end of a teasing comb to make it a straight part.
STEP THREE // GIVE YOURSELF PONYTAILS
It’s as easy as it sounds. Use elastics and pull each side into a ponytail. Try to make it closer to the back of the head (versus side of the head) because it will show in front.
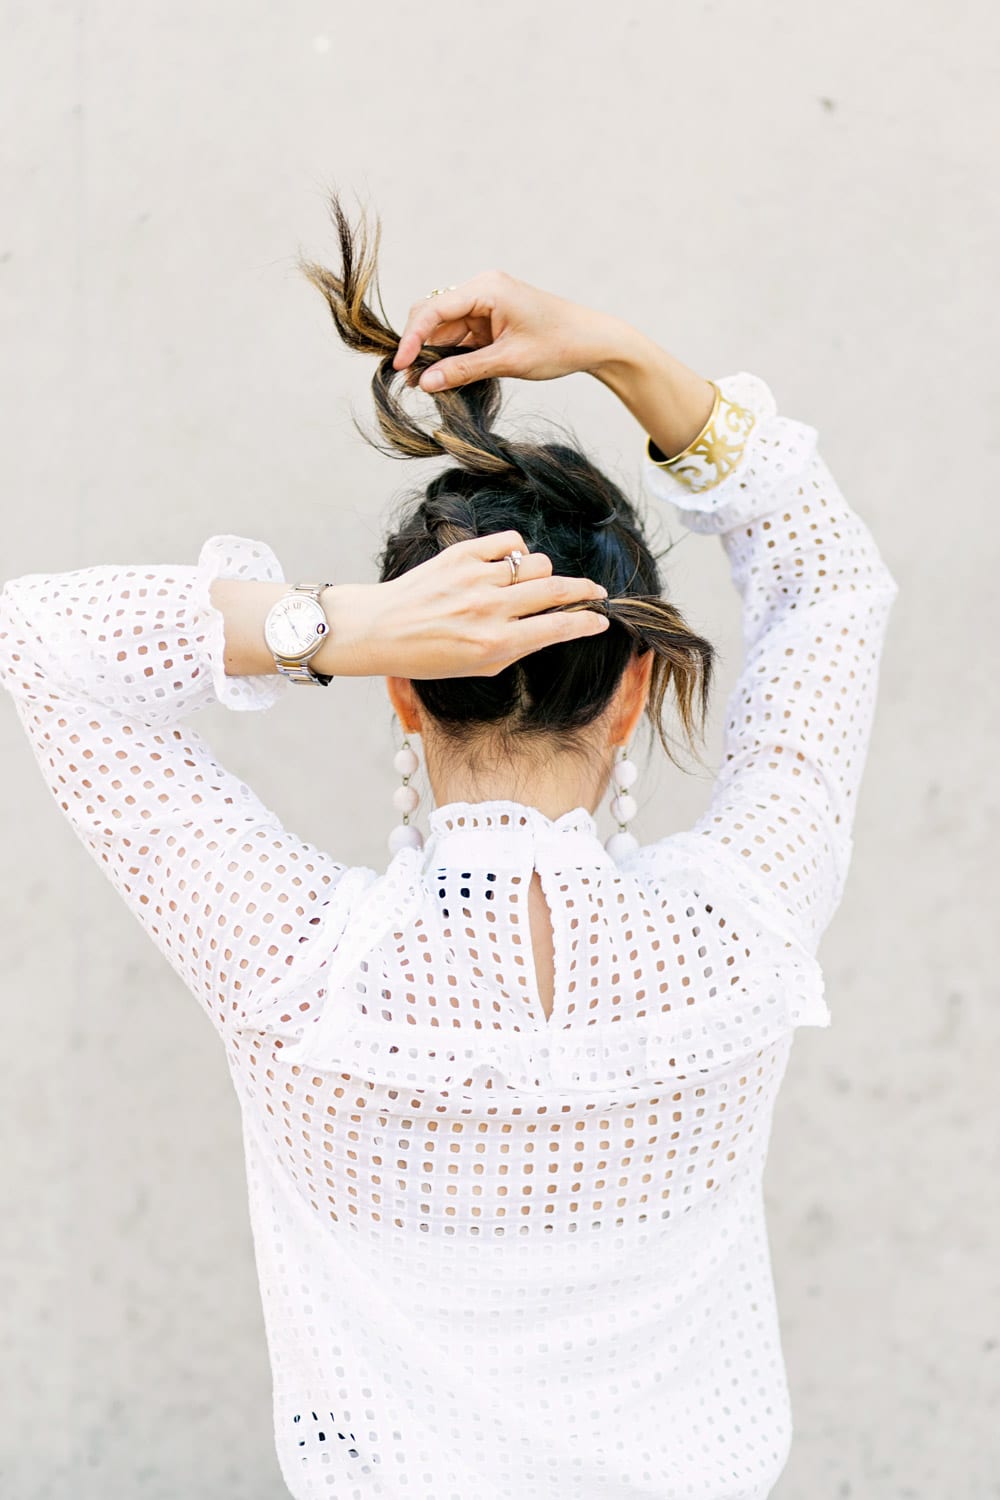
STEP FOUR // BRAID EACH SIDE
After loosely braiding, then secure the ends with an elastic. You can pull the sides of each braid the make it appear bigger. The messier, the better!


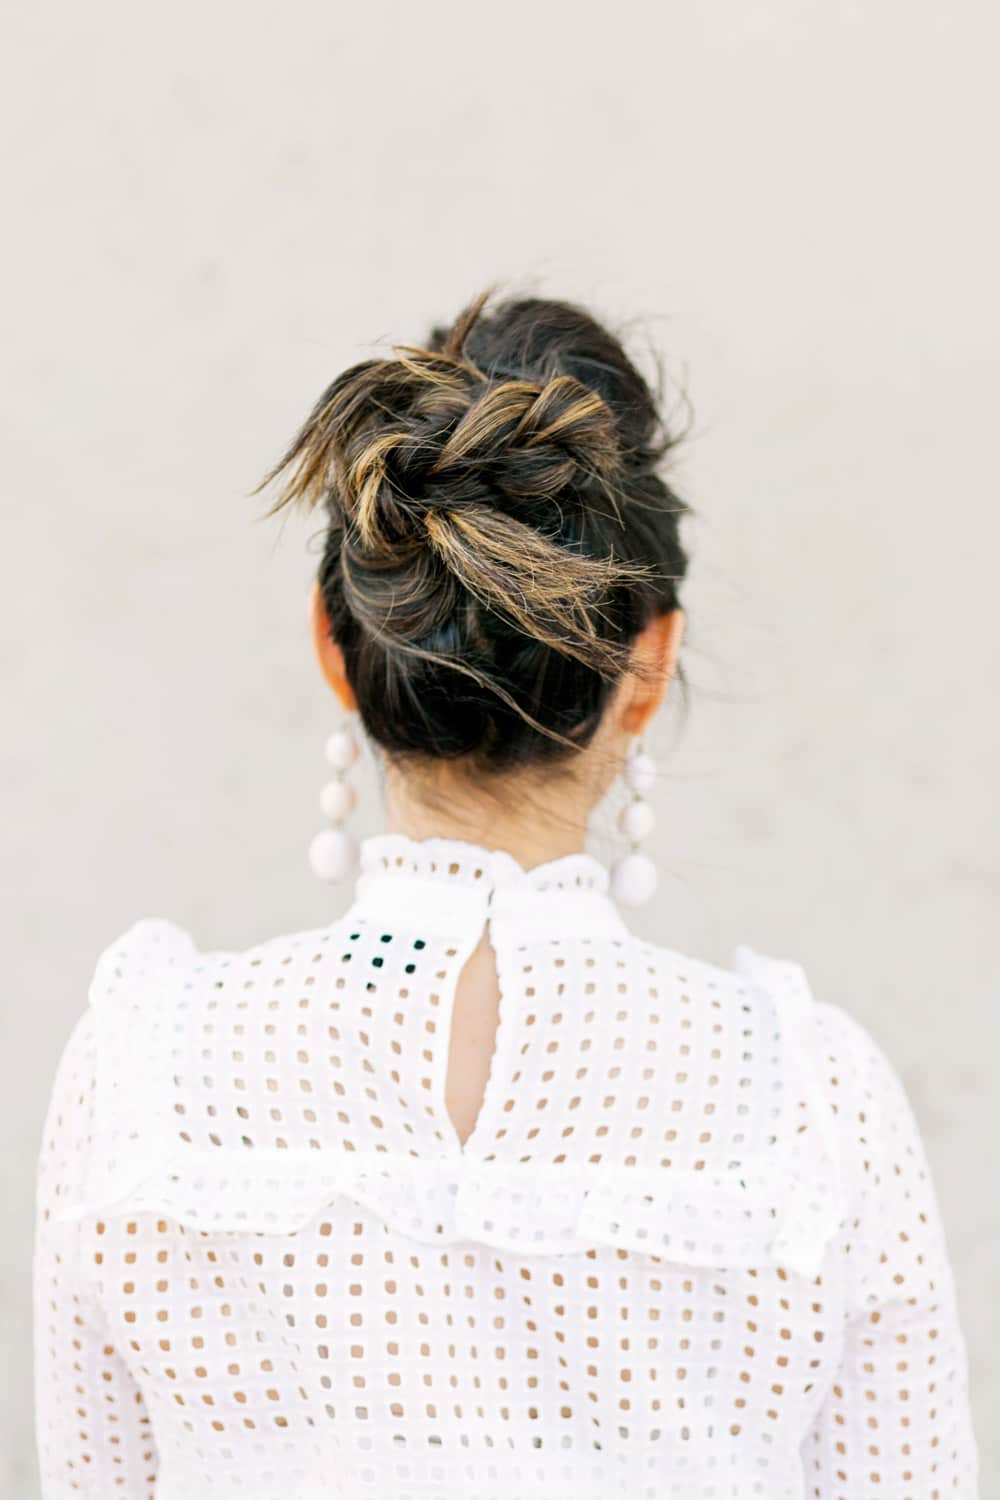
STEP FIVE // DO THE TWIST
Take one braid and wrap it OVER the top of the other braid. Take the other braid and wrap it UNDER the other braid. Then secure it with magic grip hair pins. I usually pin one above each ponytails and where the braids end. You can either tuck the ends in for a more refined look or leave them out as I did for an “undone” look.
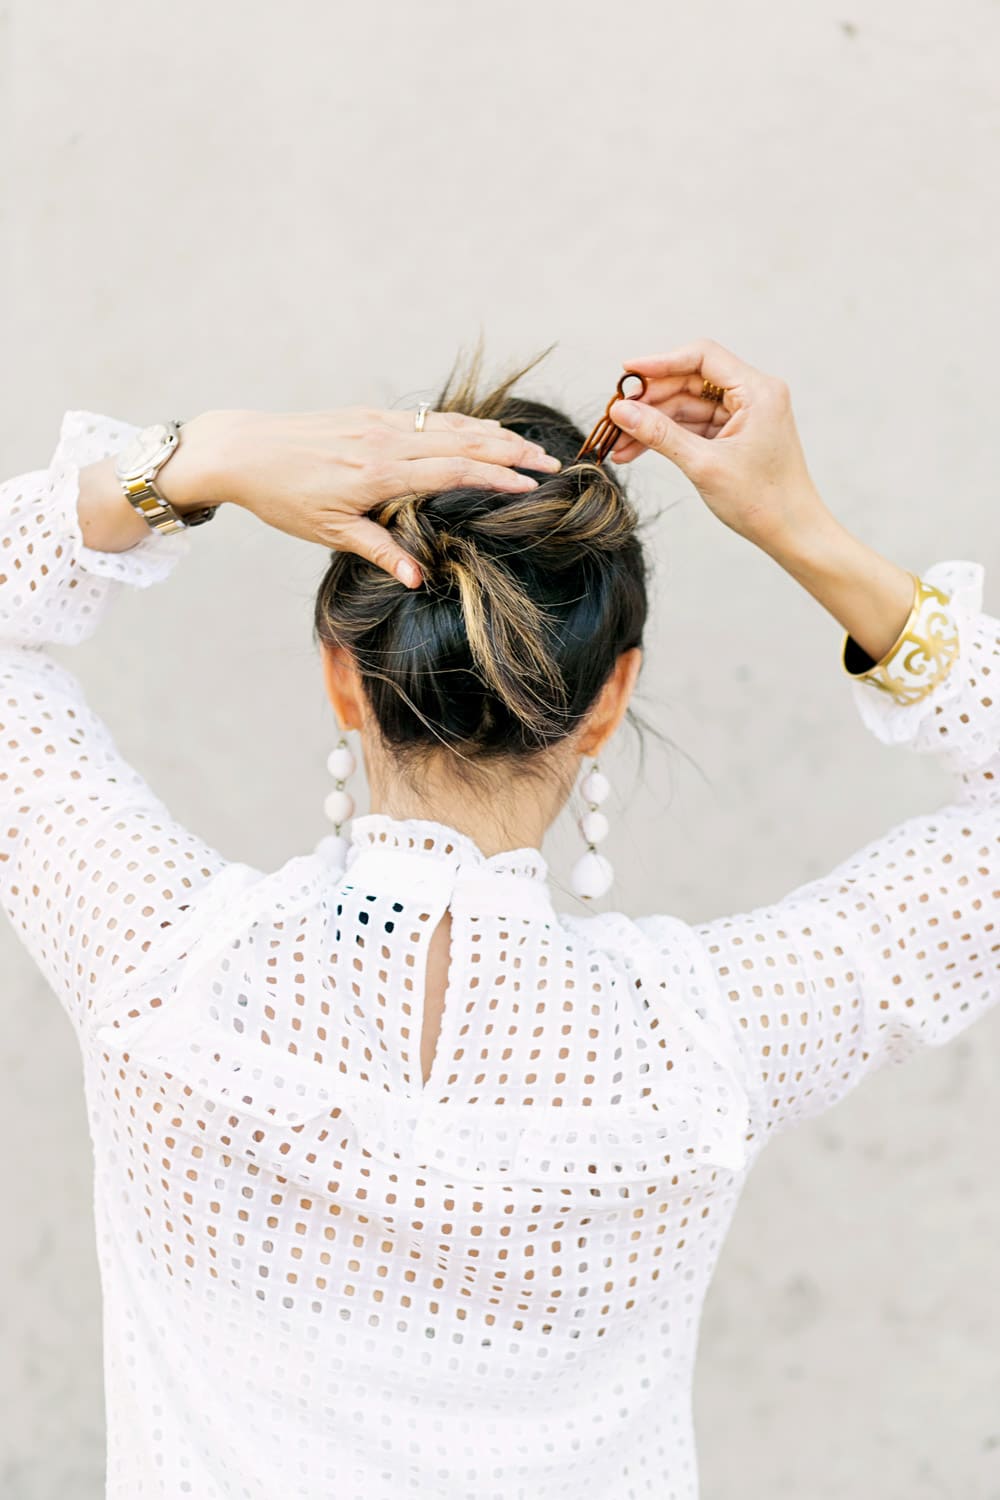
STEP SIX // HAIRSPRAY
If you wish, then set that hair and get the flyaways down! Voila! You’re done and have some pretty cool hair now!
Hope you enjoyed this super quick tutorial! What’s your GO-TO for hair updos? I discovered this after Baby M was born and I was trying to disguise dirty hair! LOL! :)
Happy Wednesday Gorgeous People! Hope you had a wonderful weekend! We enjoyed lots of family time, which is always my favorite! This week is work, doctor’s appointment, and a Chic photo shoot! What are you up to?
// outfit from this blog post ~ Mixing High and Low to Look Expensive! //
GET THE LOOK
eyelet top TARGET
cami {old, similar}
jeans J BRAND {old, similar}
earrings BAUBLEBAR c/o
balcons du guadalquivir bracelet HERMES
ring MICHAEL KORS c/o
wedges ELAINE TURNER {in python}
bag CELINE {pre-owned}
lemon coin purse COACH {old, similar and so many others!}
lips ILIA lipstick in Madame Mina
Thank you so much for stopping by and supporting SOS! I truly appreciate it!
JOIN THE #SAMFAM // SIGN UP FOR THE NEWSLETTER BY CLICKING HERE.
CHECK OUT MY INSTAGRAM SHOP HERE TO SHOP ALL OF MY INSTAGRAM LOOKS!
// FOLLOW ALONG //
INSTAGRAM ♥︎ BLOGLOVIN ♥︎ FACEBOOK ♥︎ TWITTER

